Creating a project
Start the program over ‘Start>Program>Your software’ or over the shortcut on your desktop. The software logo appears on your screen. Next the program window opens with a grey background and the catalog on the right-hand side. Select with the mouse the ‘File’ menu in the taskbar. Now click on ‘New’ to create a new project.

A 2D view with the title ‘New Project 1’ is now opened. This can be enlarged to a full screen with the maximise button in the top right-hand corner of the window. On the right-hand side you can see the project viewer, which shows the structure of the project. Select the title ‘New Project 1’ with a right mouse-click and choose ‘Rename’ in the context menu. Now enter a suitable name for your project, e.g. ‘House 1’. Confirm your input with ‘Enter’. You can now see that the name to identify the window has also changed.

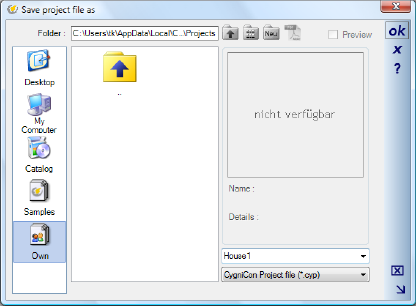
Before you start work on a new project you should first save it. To do this, use the ‘File>Save as’ menu.

The software automatically suggests a directory in which to save your project under ‘C:\Documents and Settings\…’. It is also makes sense to enter the project name as the file name in the second-last field on the bottom right of the dialog box.

The directory that is provided by your software to save your projects is found on the left-hand side of the dialog box with the title ‘Own”. You can of course use any other directory to save your projects. The quickest way to achieve this is with a click on the icon ‘My computer’. Then enter the file name and confirm it with ‘OK’. Your project is now saved under a new name and you can save your work at any further stage over the ‘File>Save’ menu or with a click on the disc icon  in the first horizontal task bar.
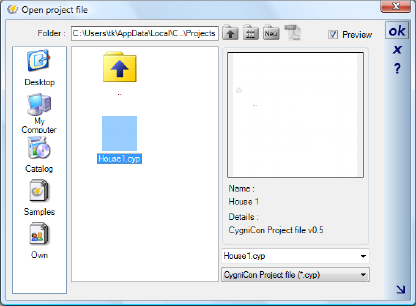
If at some later date you select the ‘File>Open’ menu to open your project again then a list of the logical project names, and not the file names, is displayed. Therefore in our example ‘House 1’ would be shown. However, if a project has been selected, the name of the file is shown in the second-last field on the bottom right of the dialog box. The project can also be found under this file name in the Windows Explorer.
