Inserting Windows
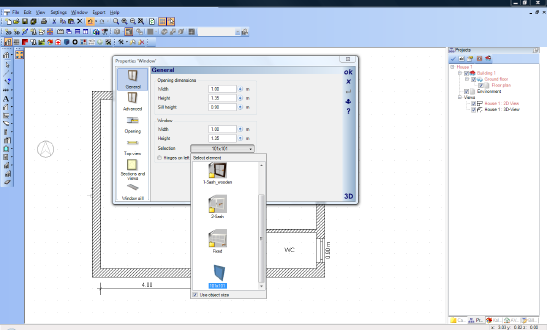
The software offers a selection of different windows and doors. We begin by inserting a standard window. Locate the button for ‘Window’ in the left-hand vertical toolbar and activate it with a left mouse click. A right mouse click on the button now opens the properties dialog for ‘Windows’. Change the height to 135 cm. and confirm it with ‘OK’.

If you move the cursor over the plan, then in the vicinity of walls a preview of the window you are inserting is shown. You can see an arrow which symbolises the direction of opening of the window depending on which side of the wall the cursor is positioned. You can now position the window freely in the wall. However we want to position the window in the middle of the exterior wall of the room marked ‘Kitchen’. To do this, we once again use the construction aids. Move the window over the right-hand exterior wall of the ‘Kitchen’ until the arrow for the direction off opening points inwards. With a right mouse-click open the context menu and select ‘Constructional support>Center point’

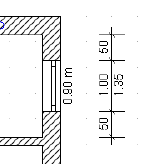
You are now requested in the status bar to enter the start point of the length to be halved. Choose as the start point the inside corner of the exterior walls on the top right. As the end point choose the inside corner adjacent to the Utility room. The window is now inserted in the middle of the wall. You can check this by activating ‘Multiple dimensions’ in the left-hand vertical toolbar.

The chained dimensions are entered using the same two points as were used to construct the midpoint of the wall.

Using the same process insert further windows in the utility room and the WC. Midpoint insertion can also be activated by pressing ‘m’ on the keyboard instead of over the context menu item for ‘Construction aids’
With a right mouse-click on the ‘Window’ button in the left-hand vertical toolbar open the properties dialog for ‘Window’ and click on the ‘Standard’ button to open a selection of windows.

Check the box ‘Use object size’. at the bottom of the selection window. With a double-click open the ‘Double casement’ folder and with a further double-click select the window ‘176 x 101.cyg’. Set the height of the window to 135 cm.

Position this window in the middle of the wall at the narrow end of the living room. In the kitchen we want to position the window at a distance of 1.50 m from the living room wall. To do this, press the key combination ‘Ctrl+w’ until the left edge of the window is selected as the reference point. Move the cursor up to the interior wall so that the blue cross snaps to it.

Choose the constructional support ‘Point with distance from’.

This tool now requires a start point and a direction. Start point is the left corner. Enter now the direction and place the window with another mouse click on the inner side of the wall. Enter 1.50 m in the appearing dialog.
