 Setting a 3D View point
With the ![]() button you can activate the dialog to set a view point. Although the result only has an affect on one or more 3D views, it is possible to set a view point equally in 2D plan views as well as in 3D views. After a click on the
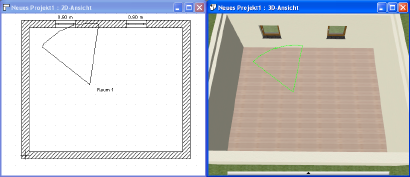
button you can activate the dialog to set a view point. Although the result only has an affect on one or more 3D views, it is possible to set a view point equally in 2D plan views as well as in 3D views. After a click on the ![]() button, you can define in the chosen view, with the first left mouse click the view point, and then with the second left mouse click a direction. As an aid, a preview of the direction and current angle defined is shown in all views.
button, you can define in the chosen view, with the first left mouse click the view point, and then with the second left mouse click a direction. As an aid, a preview of the direction and current angle defined is shown in all views.

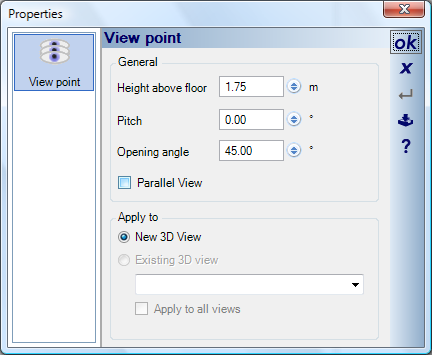
The second mouse-click opens the ‘Properties’ dialog. Apart from the height above the floor, the pitch and the opening angle, you can also specify whether a new 3D view should be opened, or whether the new view point should apply to an existing or all 3D views.

Setting a view point, initially only facilitates navigation to the same position using the other possibilities for 3D views, and is not automatically saved as a view point. If this is desired, the view point must be saved with the  button.