The ‘Surface’ Dialog
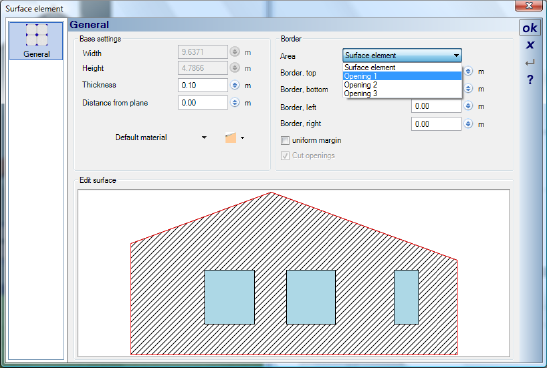
The ‘Surface’ dialog is activated as soon as the definition of a surface area has been completed.

In the ‘Base settings’ section you can specify the thickness of the surface and the distance from the selected plane. The distance from the plane can also be a negative value if the surface is to be set back from the plane.
An important part of the dialog is the interactive sketch in which the current dimensions of the surface area are shown and in which, for example, you can select the various openings using the mouse. Alternatively, you can select the surface area and openings by means of the drop-down list for ‘Area’.

The surface area itself and the openings can be modified using the settings for ‘Border’, which always apply to the active area, highlighted in red in the drawing.
An example: You would like to tile a wall but not to the full height of the room. You could define the area manually with a rectangle or alternatively use the ‘Plane’ construction aid and then limit the surface area using the settings for ‘Border’.

You can also create borders for openings. First select the desired opening and then define, for each side individually or as a uniform margin, the area which is to be excluded from the surface area.

In some cases it may be required that openings are not cut out of the surface area but instead are covered the surface. In this case deactivate the ‘Cut openings’ option.
