 Floors / Creating New Floors
You can create new floors and apartments for the active ‘Building’ level in the tree structure.

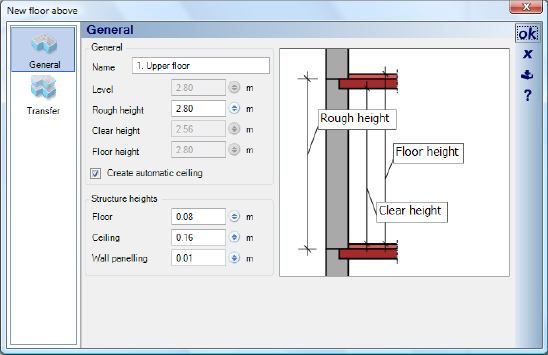
A new floor is created either above or below the current floor i.e. the one shown in red in the tree, depending on the option chosen, and begins with the ‘New floor above’ dialog.

The name of the new floor, its height, as well as the thickness of the flooring and the ceiling structure are specified in the first part of the dialog.
The setting for ‘Wall Panelling’ has no visible effect in the plan. However, it is taken into account in the calculation of areas and for project reports. The default value entered here can be changed later in the wall properties for each wall.
The ‘Transfer’ part of the dialog defines which elements of the original floor should be copied or ignored. In the ‘Objects’ area, you can specify in detail the objects that are to be copied. The options ‘all’ or ‘none’ can be used, apart from their obvious usage, to assist object selection. If you only want to copy a small number of objects, first select the option ‘none’, which deactivates all the objects listed in the tree. Only four mouse-clicks are then needed to copy walls, flooring and ceilings, and all other objects do not have to be excluded first.

More:
 Lengthen, Rotate, Mirror, Copy Buildings