Material Selection and Texture Coordinates
The software distinguishes basically between building materials and visualisation materials. Building materials are defined in a XML file, with a hierarchy, numerous additional properties, and a reference to a visualisation material (*.mat). Their properties, irrespective of the material shown in the 3D visualisation, are available to other plug-ins for analysis purposes, e.g. for energy analysis or for other calculations. In the database, building materials are allocated appropriate visualisation materials, so that a wooden material has a ‘wood’ texture. Nevertheless, the fact that building materials are independent of visualisation materials means that you can allocate any material or texture from the standard catalog to a component in the 3D view. This could result in a component still having the material property of ‘wood’ but in 3D being shown as tiles if you allocated a ‘tile’ texture to it by drag and drop.
The reason for this distinction is to ensure that reliable material properties are always available for analysis purposes, without restricting the creative possibilities in your software.

The arrow on the right of the box for material selection allows access to the materials defined in the building material database, which are displayed in a tree structure.
The texture coordinates of the visualisation material can be changed if necessary in the dialog which is activated by the  button

Texture coordinates are set by default to 1 x 1 m. This means that the texture (the image) which covers a surface is shown once for an area of 1 x 1m. If the surface is larger, the texture will be ‘tiled’, i.e. repeated as often as is necessary to completely cover the surface. Over ‘Texture dimensions’ you can adjust the area for which the texture is shown once, to match the actual size of the textured surface, and additionally define an angle of rotation or offset.
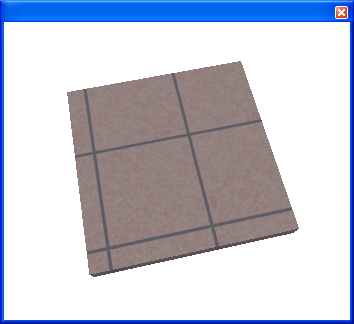
The ‘U / V offset’ has the effect that the area in which the depiction of the texture begins is offset by the values specified. In the example shown a surface of 1 x 1 m is covered with a texture representing 4 tiles. Without an offset the 4 tiles would fit exactly on the surface. In this case, with an U / V offset of 10 cm, the tiling starts offset by 10 cm on either side.
